Switch Group:
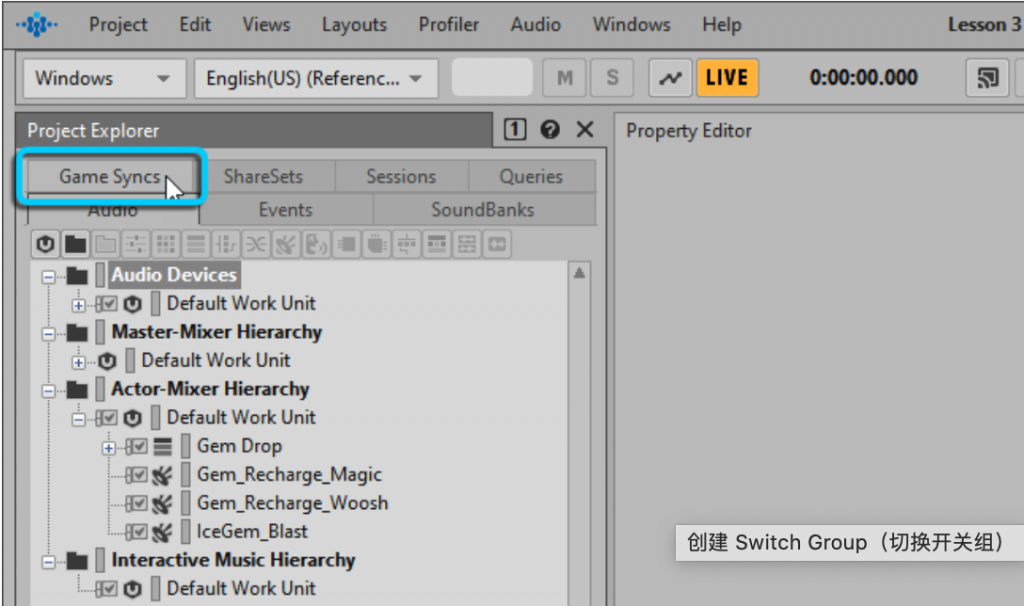
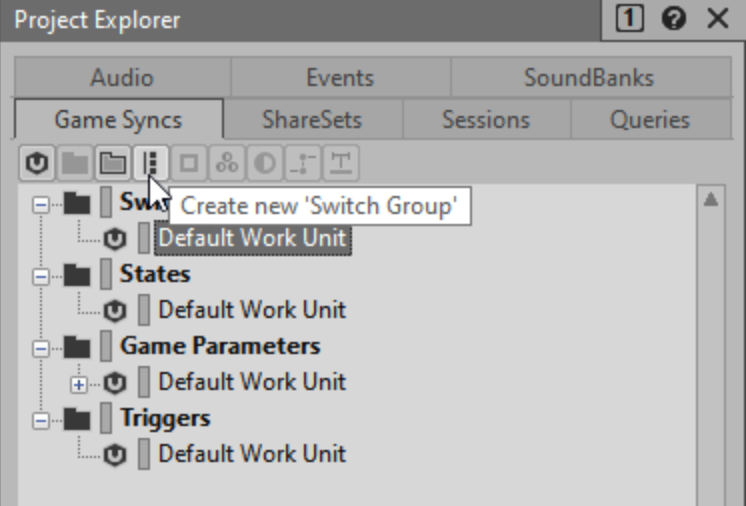
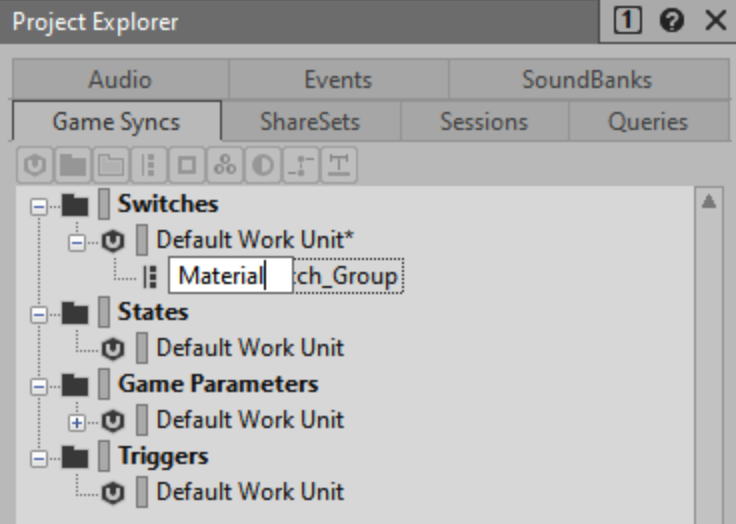
Under the “Designer Layout”, select the “Game Syncs” option in the “Project Explorer”. Under the “Switches” folder, select the “Default Work Unit”, then click on the ‘Create new “Switch Group”‘ icon. This object can not only affect footstep sounds but also adjust the sound of gems falling on the ground based on the different materials the player walks on. Therefore, we name this object “Material.”
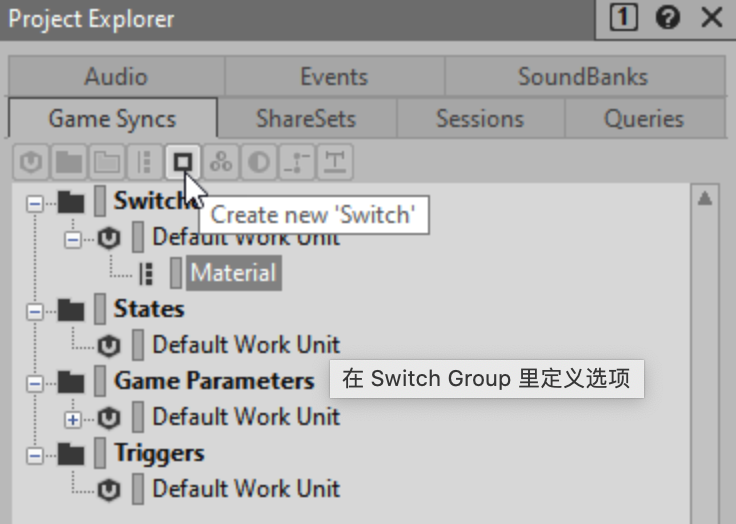
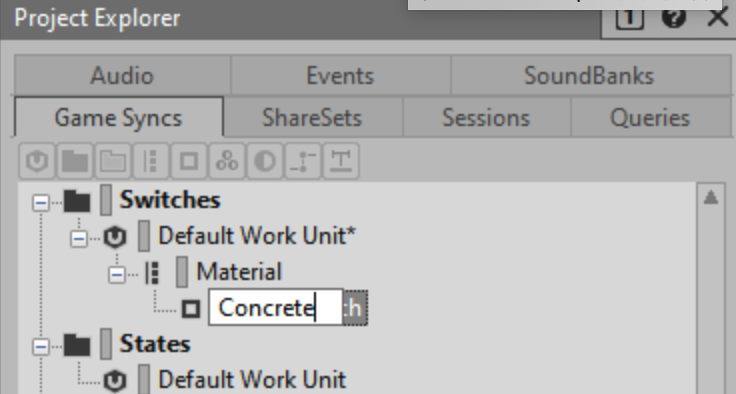
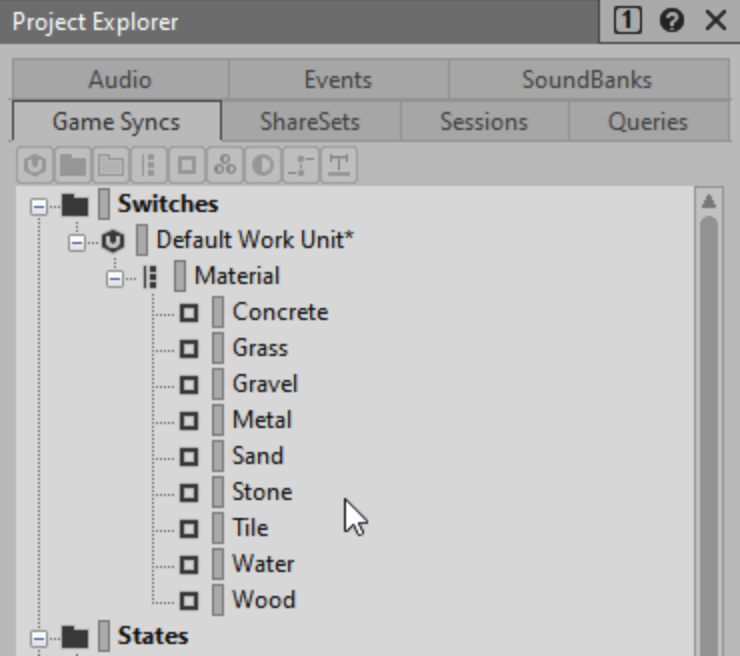
Select the recently created “Material Switch Group” object, then click on the Create new ‘Switch’ icon. Name the “Switch” object “Concrete.” Since there are 9 different materials in “Cube”, we need to represent them within the “Switch” group.
Switch Container:
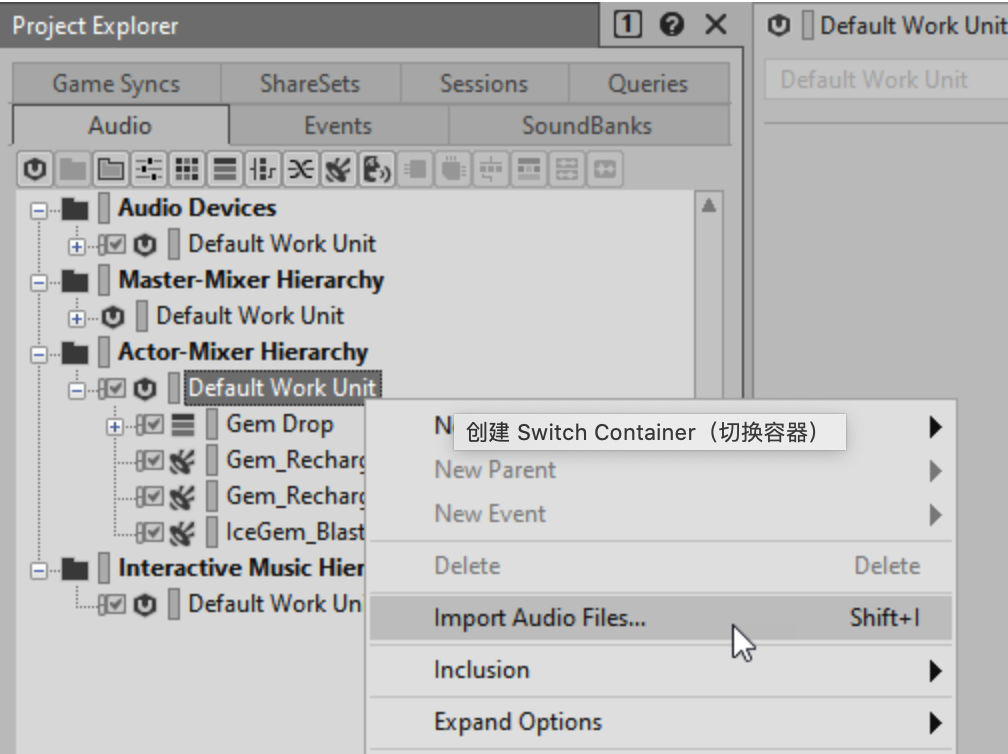
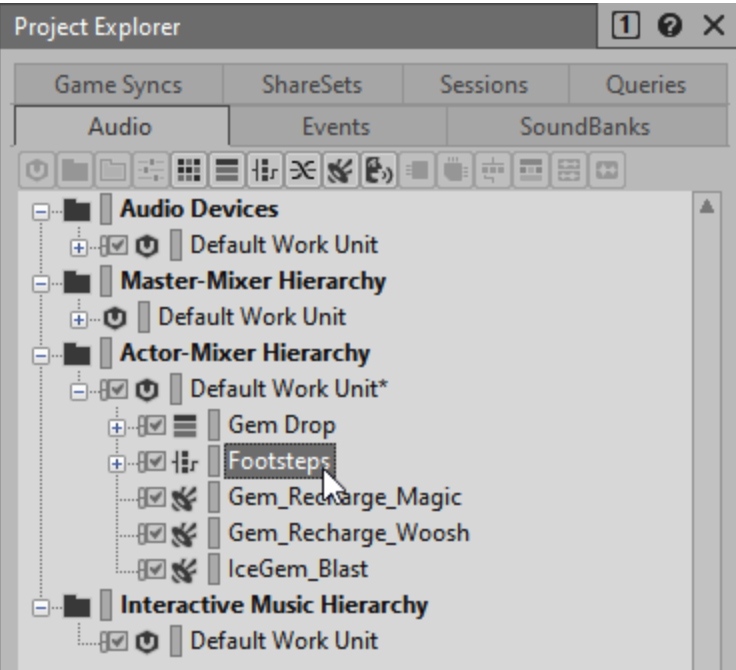
In the “Audio” tab of the “Project Explorer”, right-click on the “Default Work Unit” under “Actor-Mixer Hierarchy”, then select “Import Audio Files…” This time, we will import a folder so that Wwise can streamline the process of creating appropriate “Random Container” and “Sound SFX” objects into a single pipeline process.
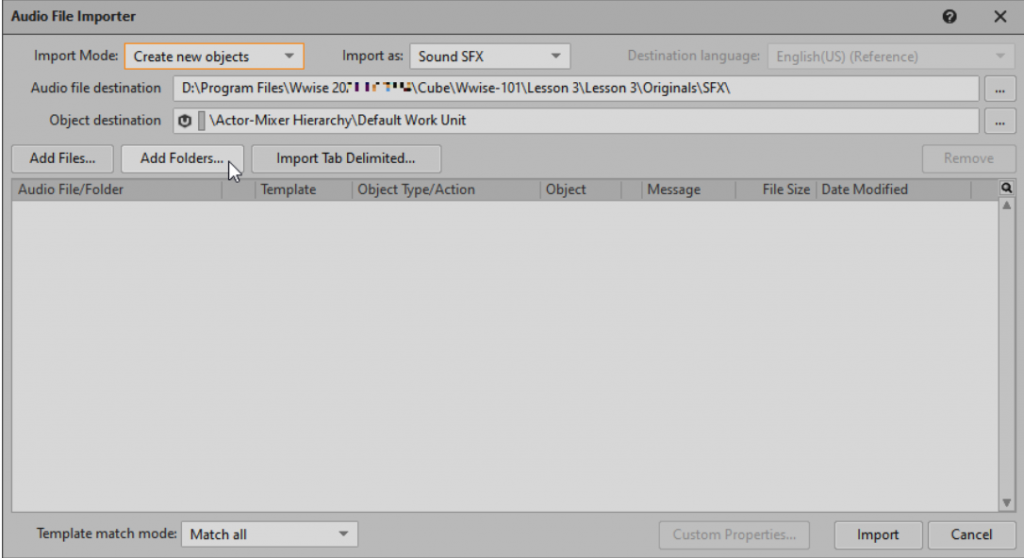
Click on “Add Folders”, navigate to Lesson 3\Audio files for Lesson 3, then select the “Footsteps” folder, and click “Select Folder”.
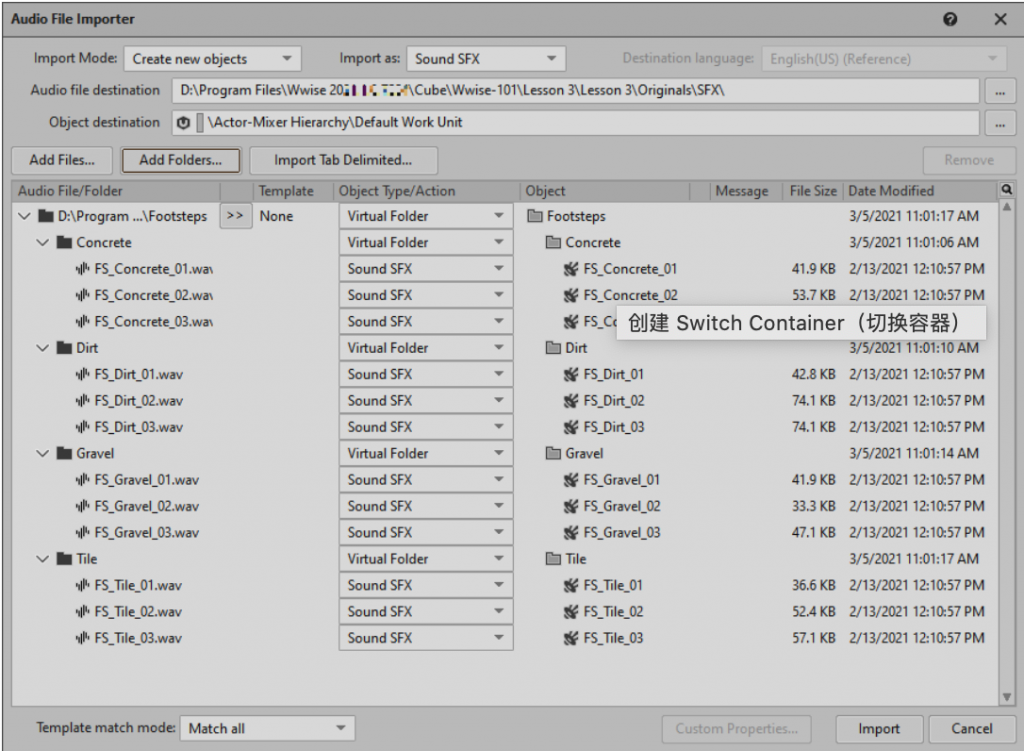
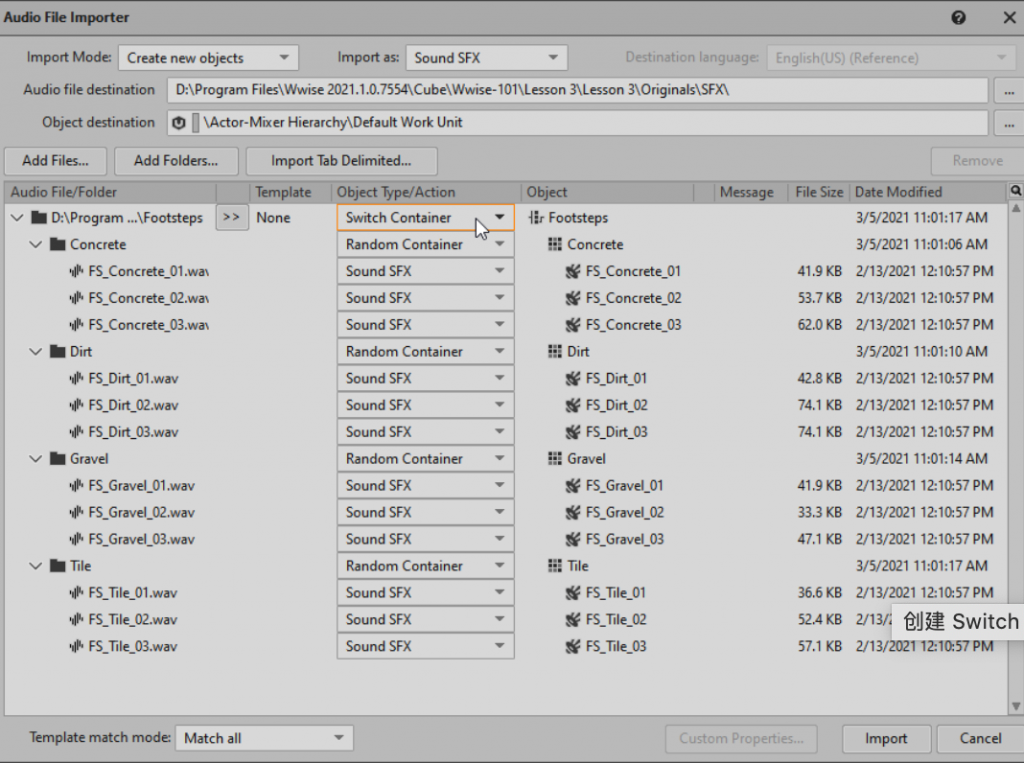
In the row corresponding to “Footsteps”, change the “Object Type/Action to Switch Container”.
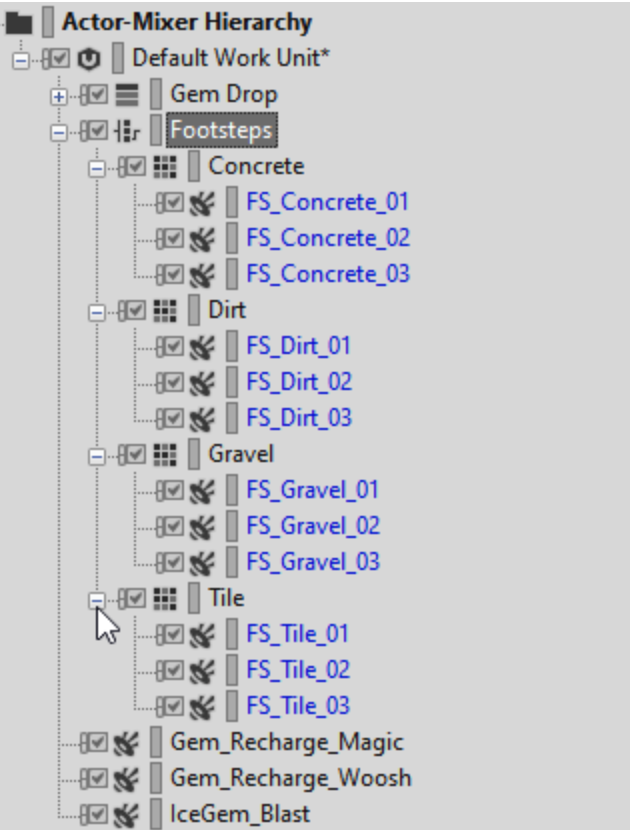
After converting “Footsteps” into a “Switch Container”, each folder inside will automatically become a “Random Container”, and the remaining objects will become “Sound SFX” objects. Click Import to proceed.
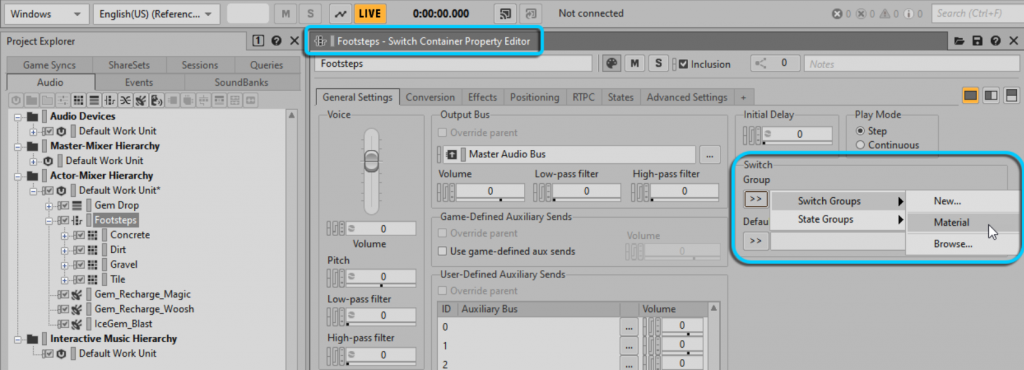
With the “Footsteps” object selected, click on the selector button [>>] next to “Group” in the “Property Editor”, then choose “Switch Groups” > “Material”.
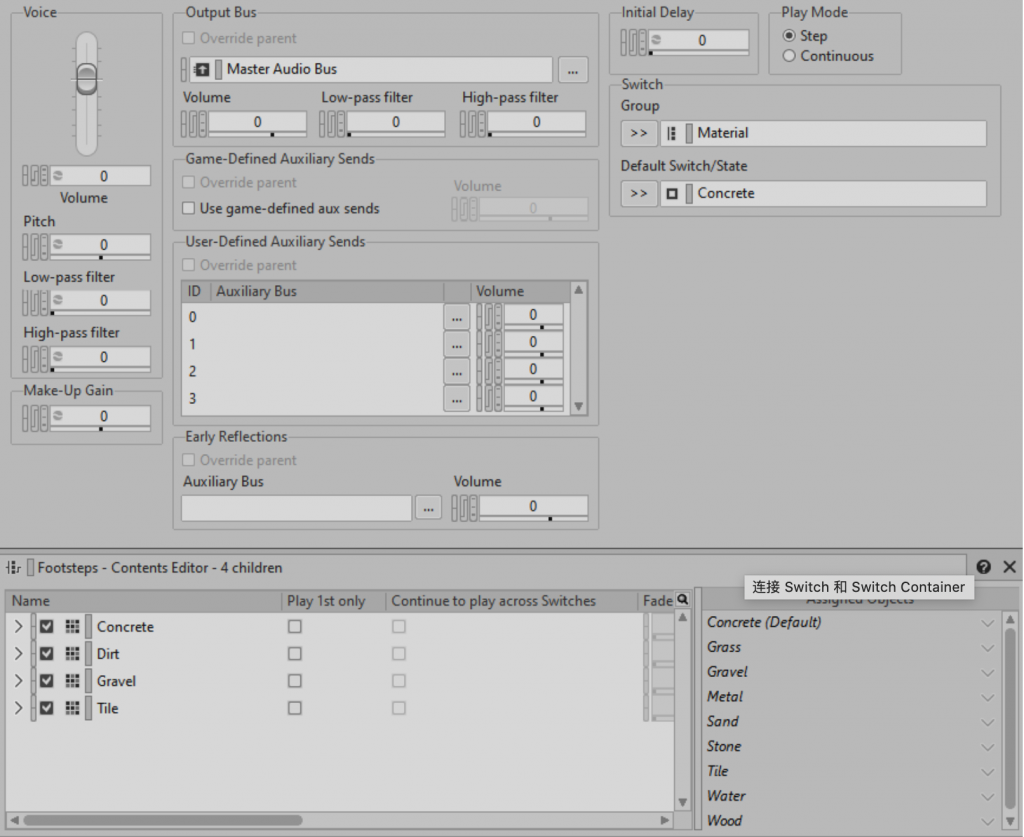
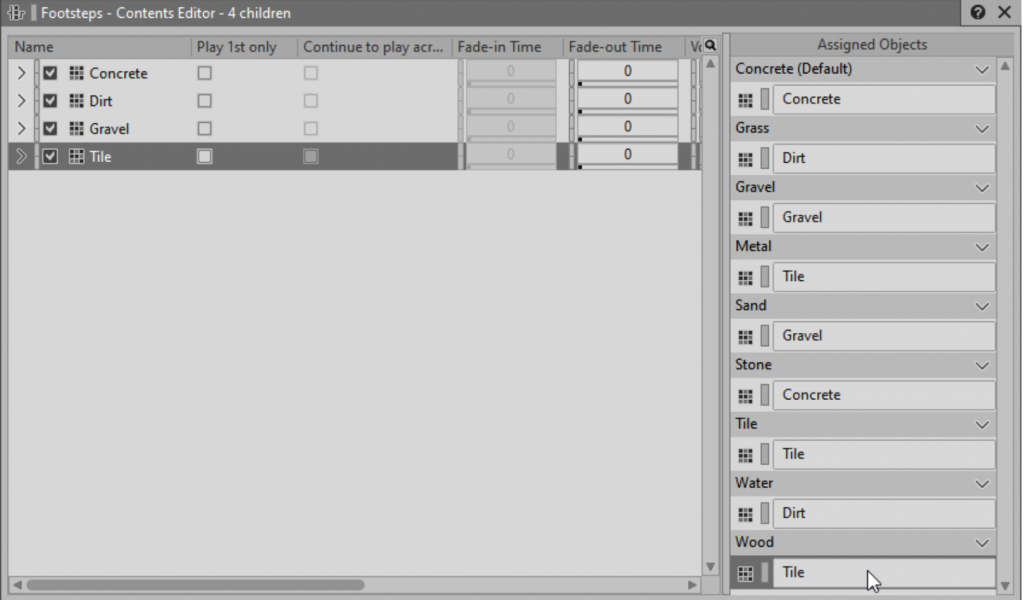
This way, the “‘Footsteps’ Switch Container” will know which type of material the player might be stepping on. If, for some reason, the game engine cannot inform the audio engine of the surface type, you’ll need to define a default surface type to use, such as “Concrete”.
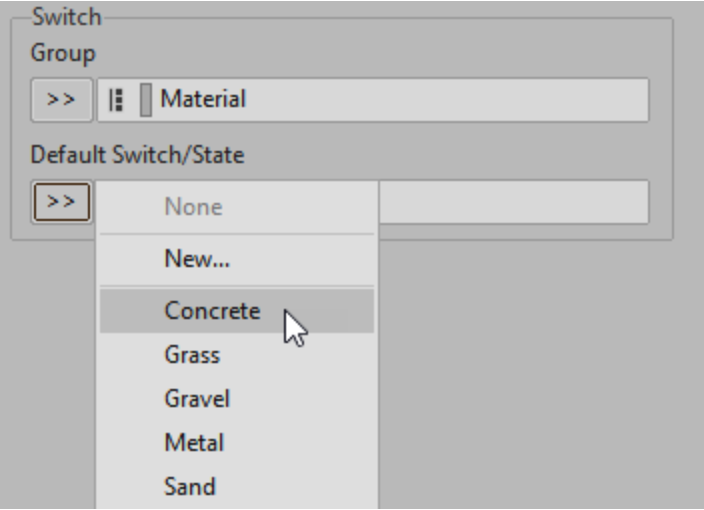
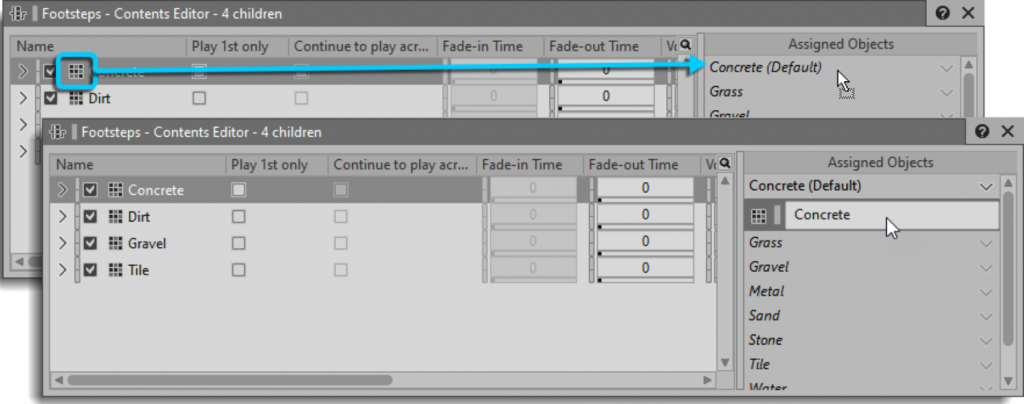
Click on the selector button [>>] next to “Default Switch/State”, then choose “Concrete”. In the “Footsteps – Contents Editor”, drag the “Concrete Random Container” object to the “Assigned Objects” section under the “Concrete Switch”. Drag the “Dirt Random Container” object to the “Grass Switch”, and continue assigning until all “Switches” have associated objects.
Switch only indicates what type of surface the player is stepping on and does not signify that the player has taken a step. Therefore, we need to create an “Event” to receive information related to footstep sounds.
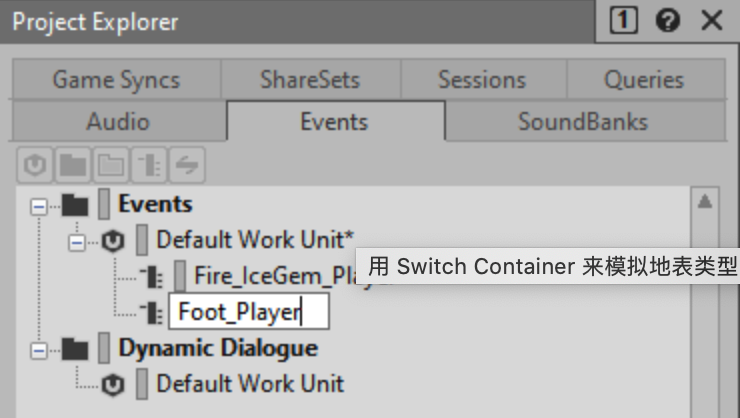
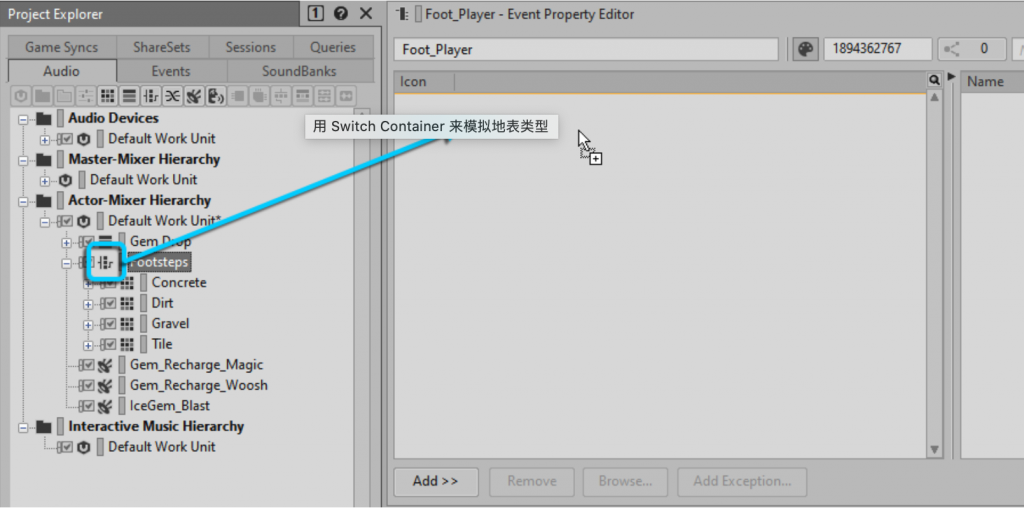
Navigate to the “Events” tab in the “Project Explorer”, then click on the “Default Work Unit” under “Events”, and create a new “Event” named ‘Foot_Player’. In the Audio tab of the “Project Explorer”, drag the “Footsteps Switch Container” object into the action list of the “Event Property Editor”.
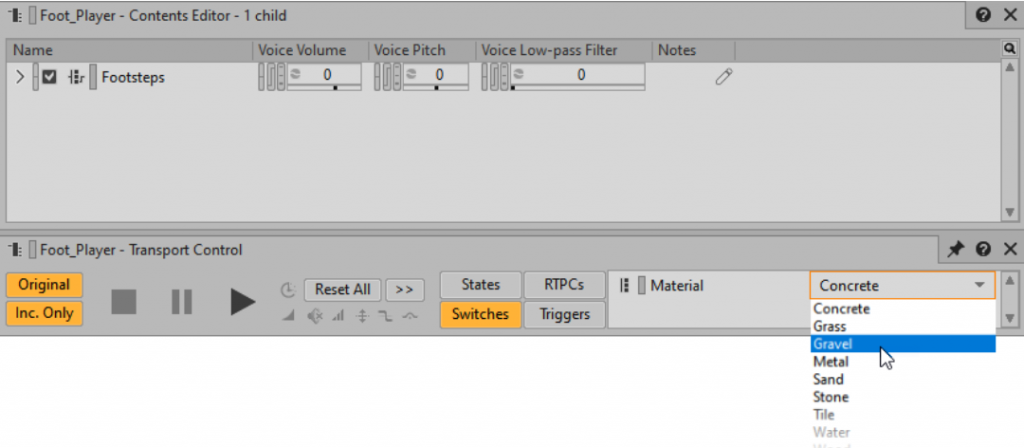
Now, playing the “‘Foot_Player’ Event” will play a footstep sound from the “Switch Container”. Unless otherwise specified for the “Switch Container”, it will use the defined default ground material.
Click on the “Switches” button in the “Transport Control” view. Choose “Gravel” from the dropdown menu, then play the same “Foot_Player Event”. You can then select other ground materials to listen to their corresponding playback effects. Click “Reset All” in the “Transport Control” to reset.

Game Parameter:
Set the player’s HP to decrease when they are attacked. As the heartbeat sound becomes louder, it indicates that the player’s health is decreasing.
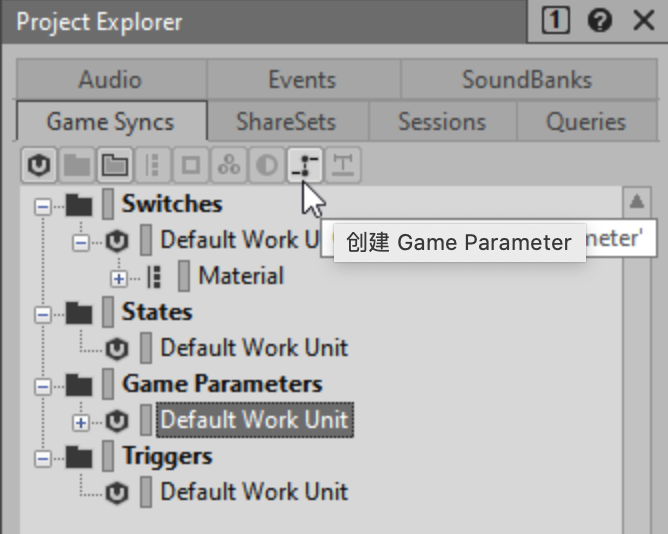
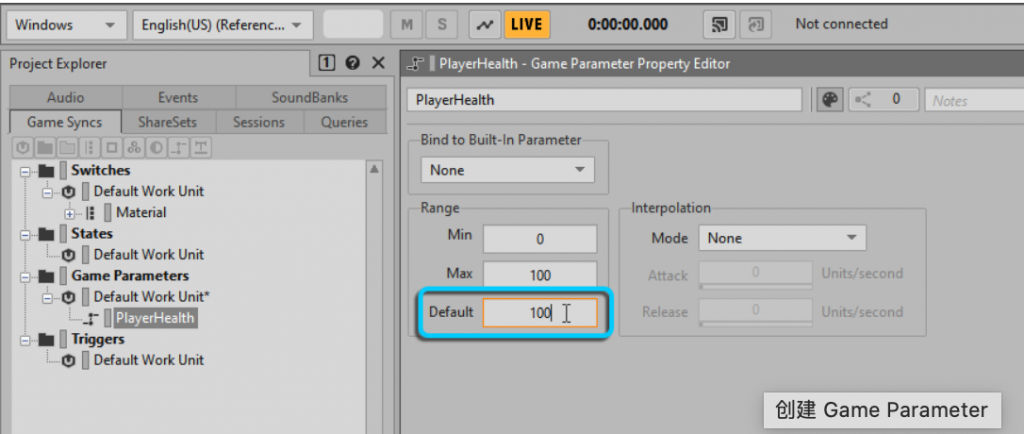
Go to the “Game Syncs” tab in the “Project Explorer”, then select the “Default Work Unit” under the “Game Parameters” folder, and click on “Create New ‘Game Parameter’”. Name it “PlayerHealth”. In “Cube,” the HP value ranges from 0 to 100, which conveniently aligns with the default value range of the “Game Parameter”, so there is no need to modify these attribute values. However, you need to define a default value so that if the game does not send the current HP value, Wwise knows where to start. Since the player starts with full HP, set the default value to 100. Change the “Default” value of the “PlayerHealth Game Parameter” to 100.

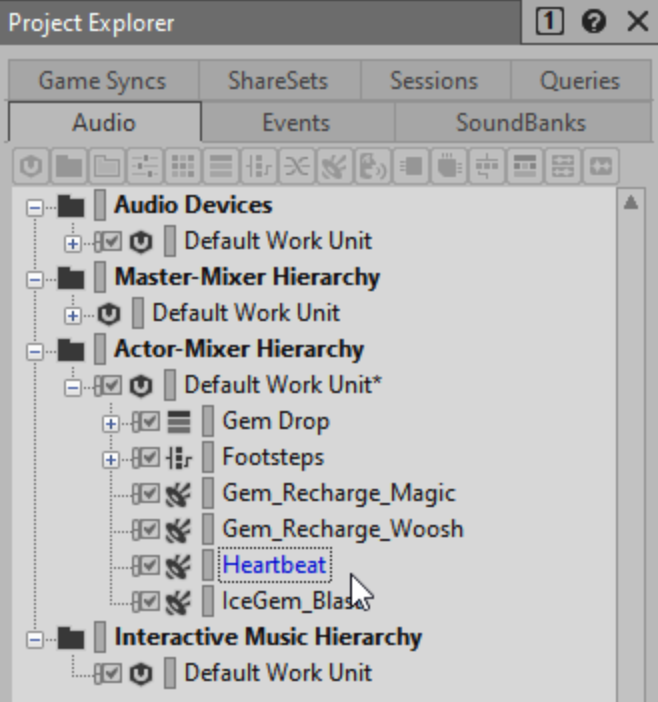
Next, import the heartbeat audio file. Click on the “Audio” tab, then drag the “Heartbeat” audio file from the “Audio files for Lesson 3” folder to the “Default Work Unit” under “Actor-Mixer Hierarchy”.
Use a single event to trigger and play the heartbeat sound. This event should only occur once when the player enters a new level. Since the player’s heartbeat should not stop too early, the file should loop infinitely. This looping behavior can be enabled in the “Sound Property Editor”.
With the Heartbeat Sound SFX object selected, click on the Loop checkbox.
Although the heartbeat sound will play continuously as long as the player is in the game, hearing it constantly might become irritating. The purpose of the heartbeat sound is to inform the player that their HP value is decreasing, so it is only necessary to hear the heartbeat when the HP value drops below a certain level.
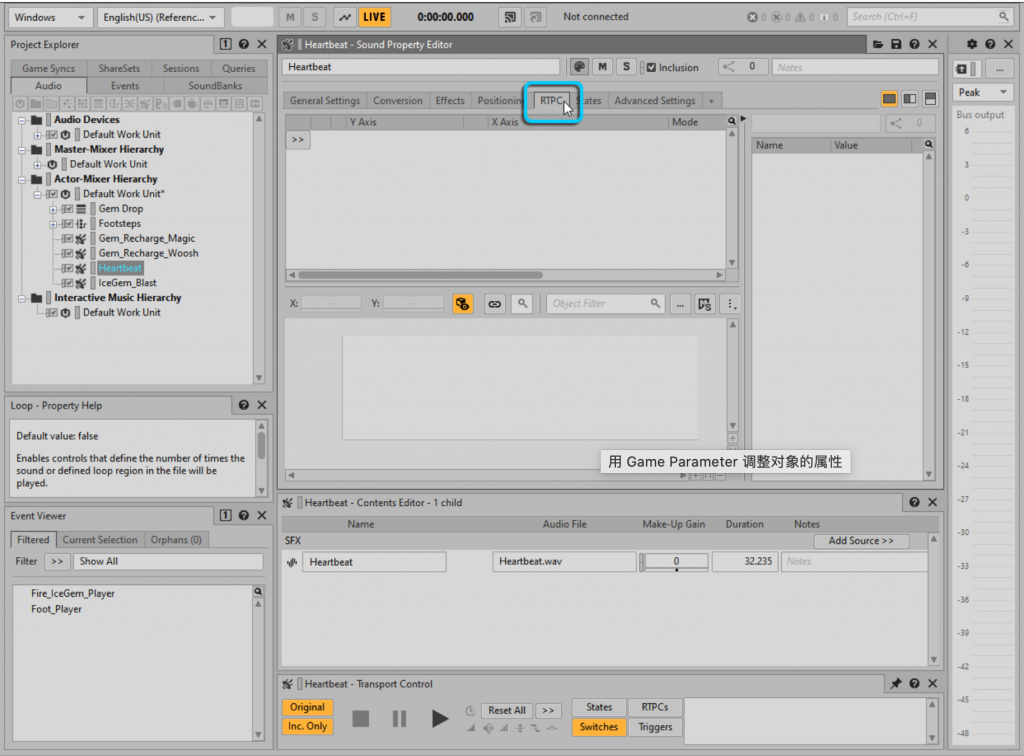
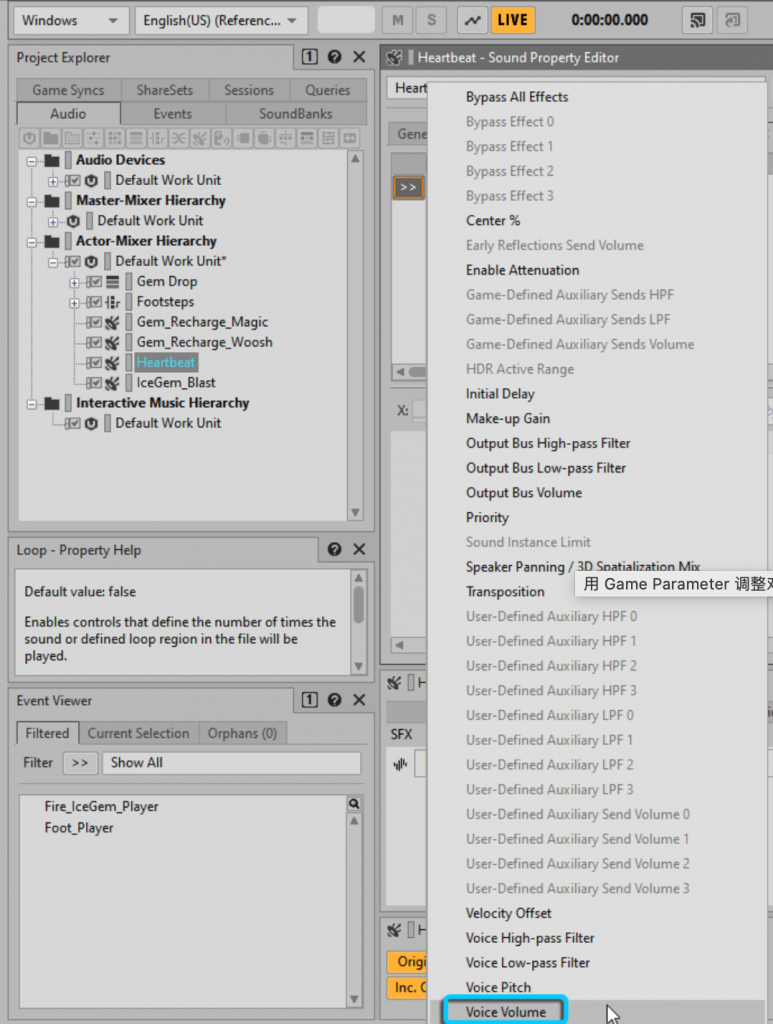
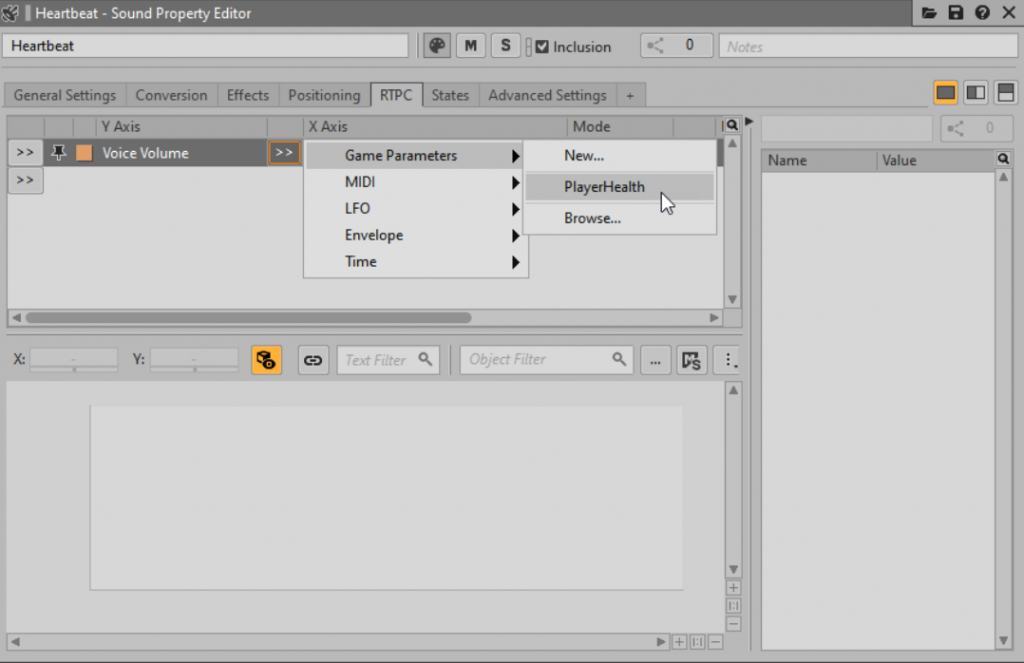
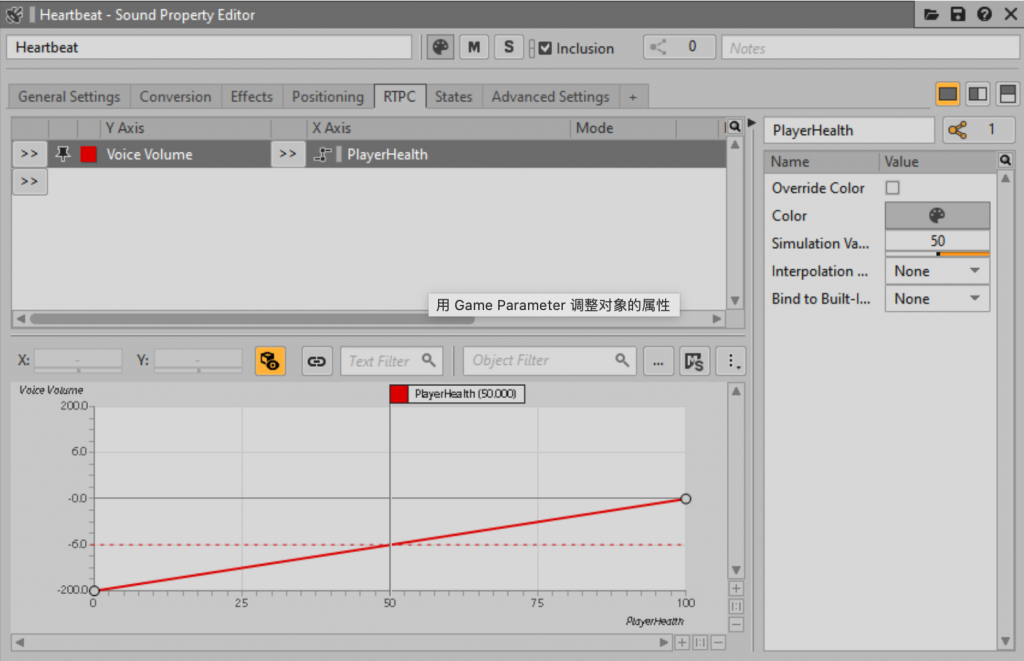
In the “Sound Property Editor”, click on the RTPC option, then click the selector button [>>], and select “Voice Volume”. Click the selector button [>>] in the X Axis column, then select “Game Parameters” > “PlayerHealth”.
In the graph, the X-axis represents the player’s HP value, and the Y-axis represents the heartbeat’s voice volume. The diagonal red line on the graph is called the RTPC curve, indicating at what volume the heartbeat will play given the player’s HP value.

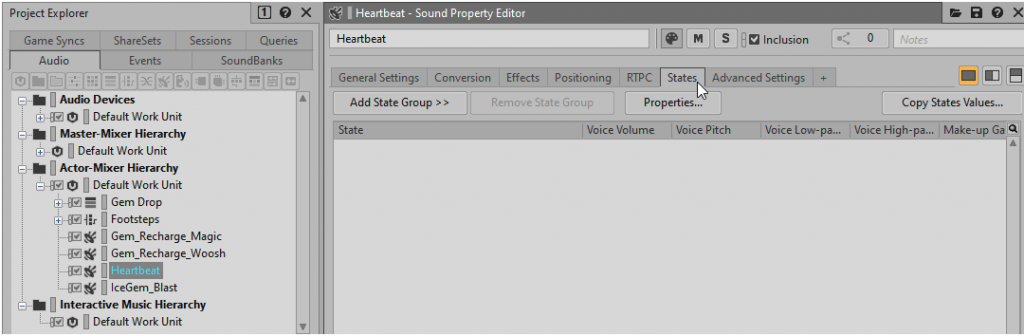
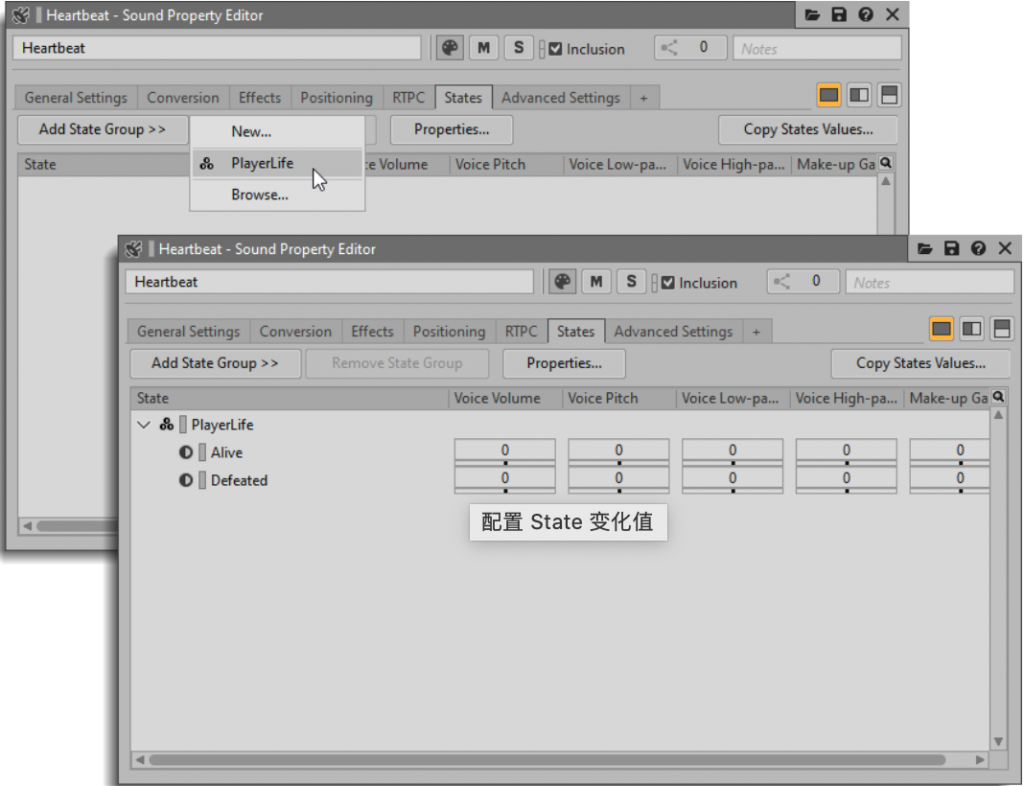
In the “Audio“ tab of the ”Project Explorer”, ensure that the “Heartbeat” object is selected, then switch to the “States” tab. Click on “Add State Group” >>, then choose “PlayerLife”. This will display the “PlayerLife” State Group and list the available states below. Each state has various parameters that can be increased or decreased when the corresponding state is active.
When the player is alive, no bias needs to be applied to any attributes; however, when the player is defeated, the volume of the heartbeat needs to gradually decrease. This can be achieved by decreasing the volume and increasing the Low-pass Filter value.
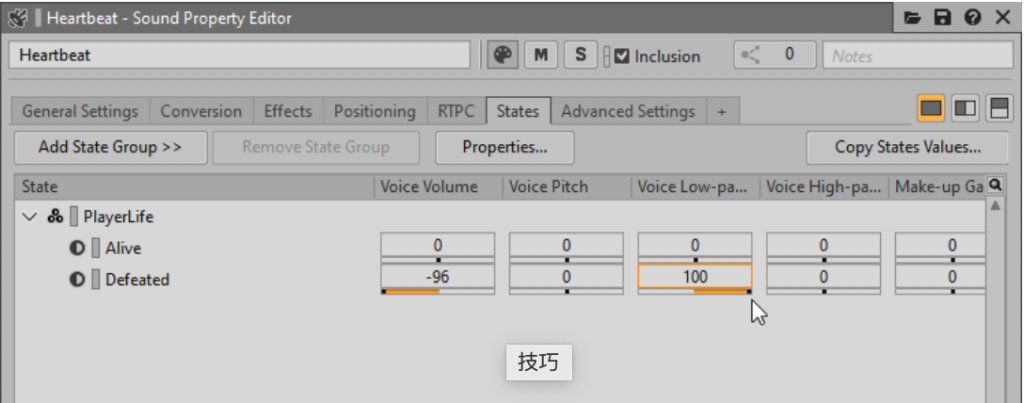
For the “Defeated State”, set both the “Voice Volume” and “Voice Low-pass Filter” to -96 and 100, respectively.
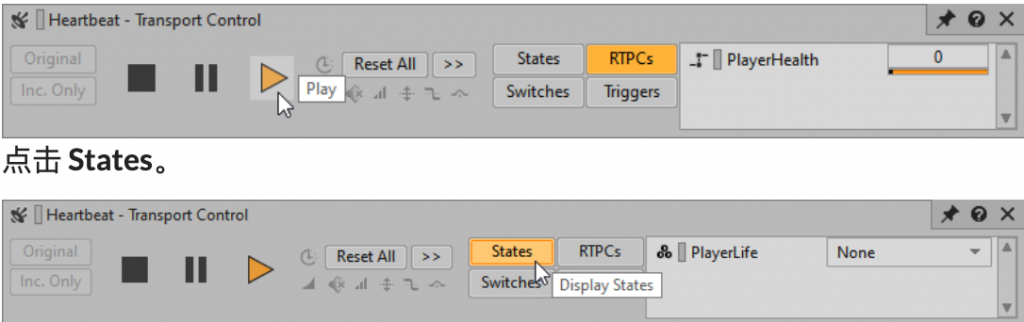
State transitions can also be tested using the “Transport Control”. Before starting the test, make sure you can hear the heartbeat sound clearly, so you need to set the “PlayerHealth RTPC” to 0. In the Transport Control view, set the PlayerHealth RTPC to 0, then click on States and change the “PlayerLife State Group” to “Defeated”.

Integrating “Game Sync” into “Cube”:
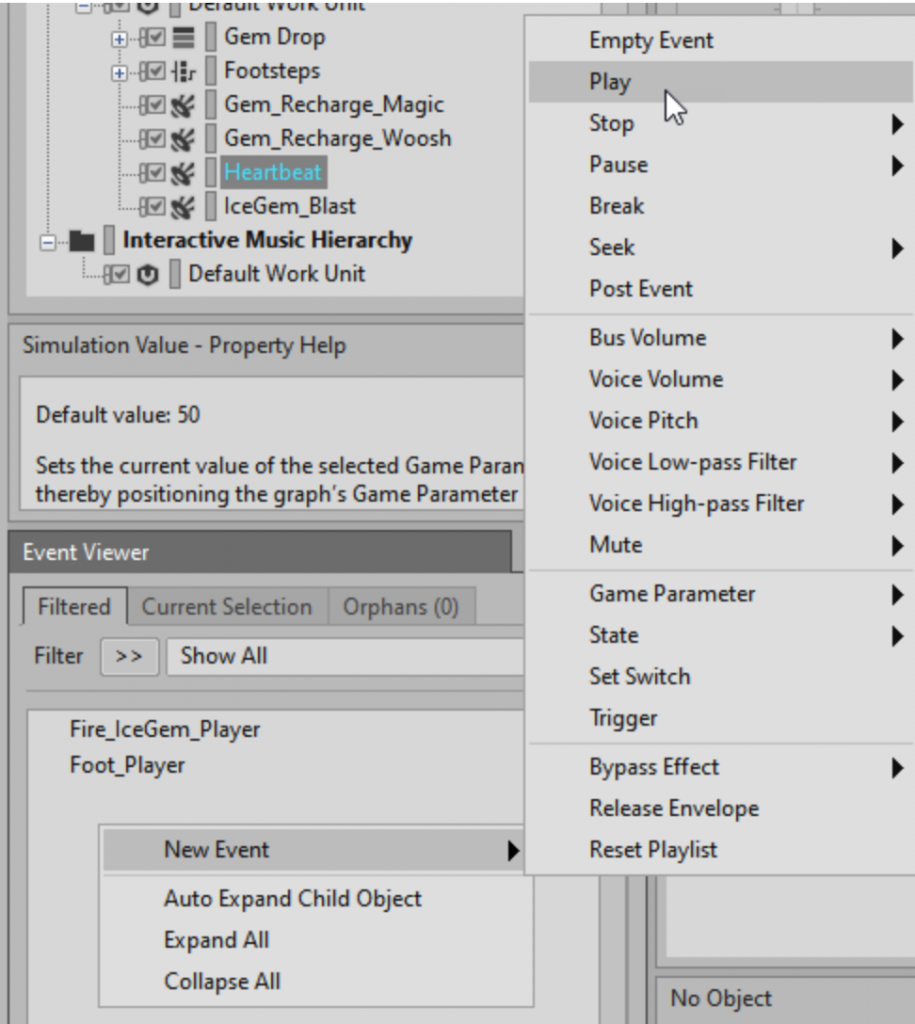
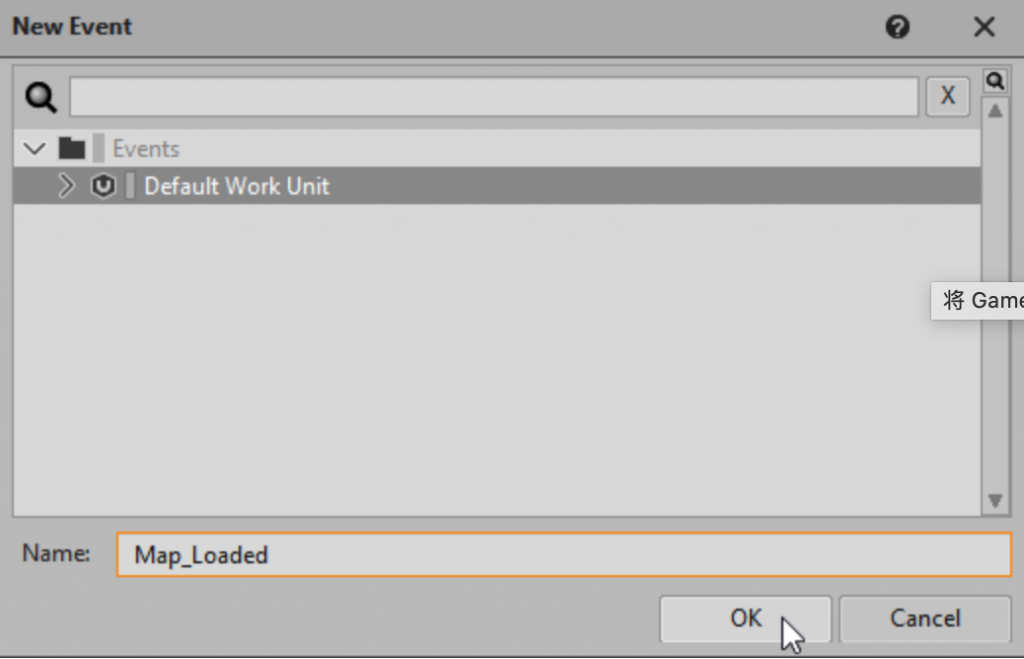
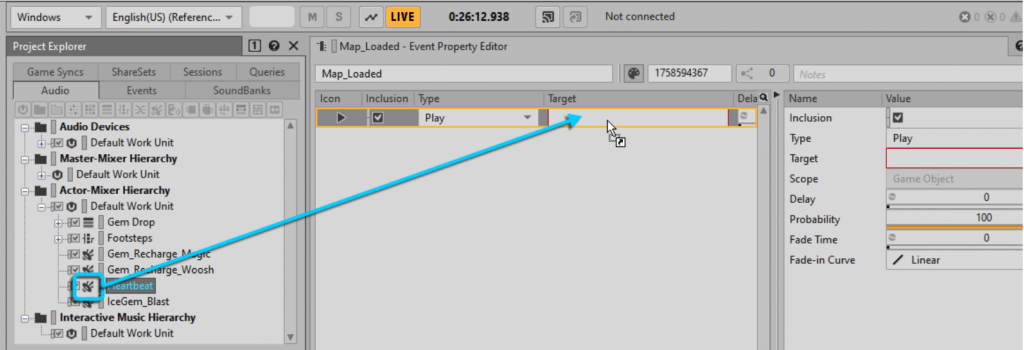
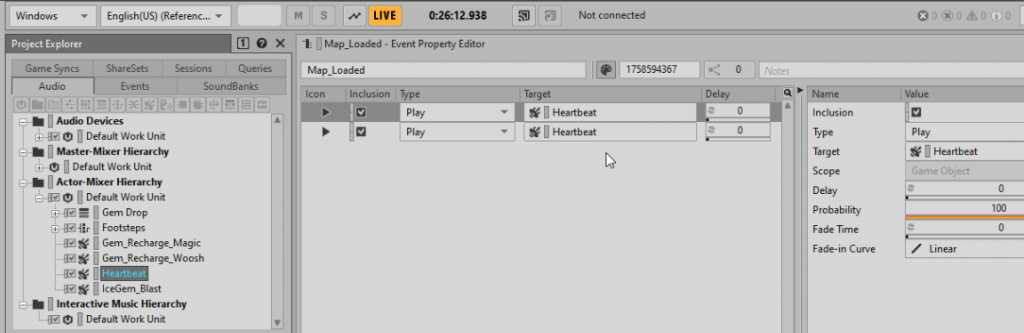
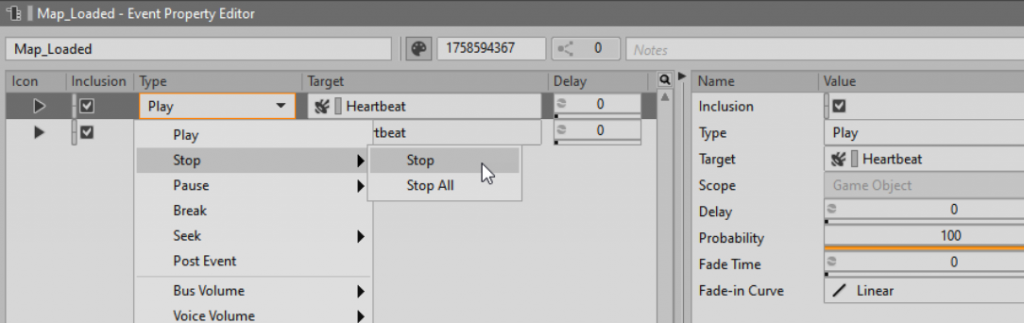
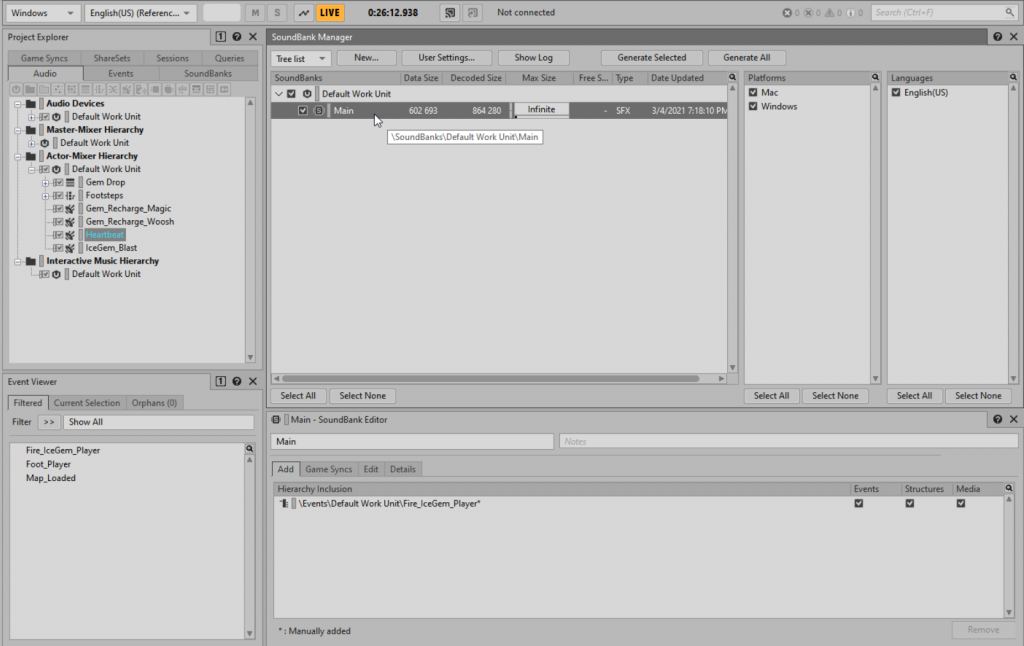
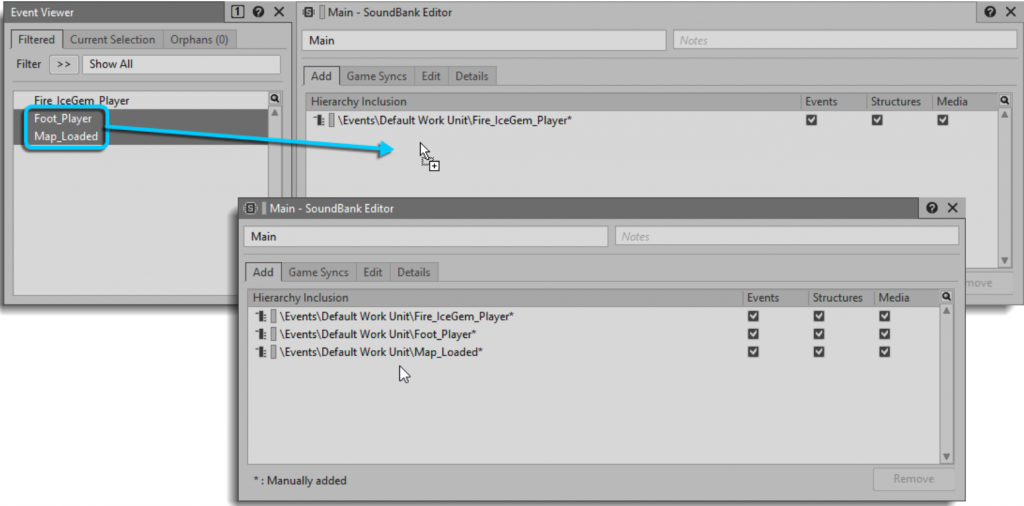
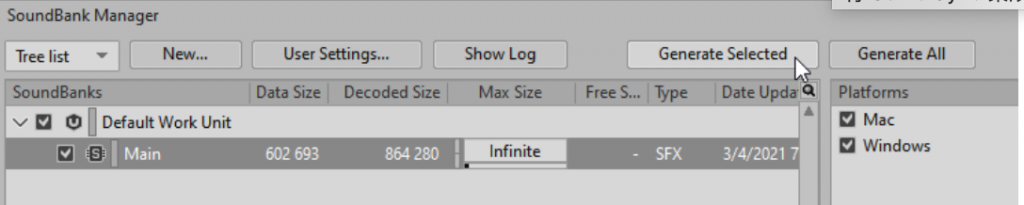
Right-click in the main area of the “Event Viewer,” then choose “New Event > Play.” In the “Name” field, type “Map_Loaded” and click “OK.” Drag the “Heartbeat Sound SFX” object into the “Event Property Editor.” Repeat the dragging action, and in the first row of the “Type” column, change the action type from “Play” to “Stop.” From the Wwise menu bar, select “Layouts > SoundBank,” then expand the “Default Work Unit” in the “SoundBank Manager” view. In the “Event Viewer,” drag both “Map_Loaded” and “Foot_Player” into the “Main – SoundBank Editor.” Press “Generate Selected” in the “SoundBank Manager” to generate the “SoundBank” integrated with “Game Sync.”